The Complete Guide to Professional Line Marking Results
Mastering Paint Thickness, Spray Tips, and Common Pitfalls
Line marking might seem straightforward - point, spray, and walk in a straight line. But as any professional knows, there's a world of difference between amateur work that fails within months and professional markings that last for years.
The key lies in understanding three fundamental principles: paint thickness, spray tip selection, and pump pressure, whilst acknowledging environmental factors will also have a part to play.

Not thermoplastic, but cold-applied MMA line marking in action...
- Why Paint Thickness Makes or Breaks Your Lines
- Spray Tip Selection: Why One Size Doesn't Fit All
- Environmental Factors: The Variables You Can't Ignore
- Troubleshooting Common Line Marking Problems
- Glass Bead Application: The Retroreflectivity Factor
- Best Practices for Consistent Line Marking Results
- Common Line Marking Misconceptions
- Building Professional Line Marking Standards
- Moving Forward
Table of Contents
Why Paint Thickness Makes or Breaks Your Lines
Most line marking failures stem from one critical error: incorrect paint thickness. Too thin, and your lines wear away quickly. Too thick, and you create what professionals call the "egg shell effect" - a hard exterior shell with soft, uncured paint underneath that never properly sets.
The correct wet film thickness (WFT) varies by product, but it's typically around 250-300 microns for standard line marking paint.
This isn't guesswork - every quality paint manufacturer provides exact specifications on their data sheets. Yet surprisingly, many contractors have been applying paint for years without ever checking these crucial numbers.
Measuring What Matters
A wet film thickness gauge is your most important tool after the spray gun itself. These simple devices cost a fraction of what you'll save in paint and callbacks. The measurement needs to happen quickly before the paint begins to cure, giving you immediate feedback on whether your application is correct.
When paint is applied too thickly, the surface skins over rapidly, creating a barrier that prevents solvents from escaping. What results is essentially a paint "shell" with uncured material trapped inside - it looks fine initially but fails prematurely under traffic.
The Economics of Proper Thickness
Applying paint at the correct thickness isn't just about performance - it's about profit. Over-applying paint by just 20% can destroy your job margins, whilst under-application leads to callbacks and reputation damage. Professional contractors who master thickness control consistently outperform their competition on both quality and profitability.

See the LineLazer ES 2000 applying white road markings
Spray Tip Selection: Why One Size Doesn't Fit All
Take a look at any line marking spray tip and you’ll see numbers like 319, 421, or 525. These aren't random - they tell you everything about the tip's performance.
The first digit indicates the spray pattern width (angle at which water is sprayed @ 15°C and 100bar, ie 3 = 30°), whilst the last two digits show the orifice size in thousandths of an inch, giving you the flow of paint.
When using a solvent based acrylic or epoxy a 319 tip produces roughly a 100mm line, whilst a 421 creates a 150mm line. But here's where many contractors go wrong - they assume they can simply adjust pressure or height to make one tip work for different line widths.
The Science Behind Spray Patterns
Lining tips are engineered to distribute paint with thicker edges and a thinner centre. This isn't a flaw - it's intentional design that creates sharp edge definition and accounts for natural wear patterns.
The pressure then fills the centre gap to create an even application.
Using the wrong tip size creates several problems:
- Poor edge definition that looks unprofessional
- Increased susceptibility to wind drift
- Inconsistent paint distribution
- Premature tip wear
Common Tip Selection Mistakes
The most frequent error is using a large tip at low pressure to create narrow lines.
This produces terrible edge definition and makes the spray gun height critical - any wind or air movement will scatter the paint.
Conversely, trying to force a small tip to create wide lines results in uneven coverage and excessive pressure requirements.

See the LineLazer ES 2000 applying white road markings
Environmental Factors: The Variables You Can't Ignore
Temperature's Hidden Impact
Here's something that surprises even experienced contractors: the same machine settings can produce dramatically different results throughout the day.
A spray gun set up at 9 AM to produce 100mm lines might be spraying 140mm lines by noon - with no settings changed.
Temperature affects paint viscosity, which directly impacts spray pattern and flow rate. Warmer paint flows more easily, creating wider lines at the same pressure settings.
This is why experienced contractors mark their height adjustments and check line width regularly throughout the job.
Pressure Adjustments Throughout the Day
As temperature changes, so must your pressure settings. The key is understanding that your spray gun pressure gauge isn't just a number - it's a dynamic control that needs adjustment as conditions change.
Some contractors may set pressure once and forget it, leading to inconsistent results.

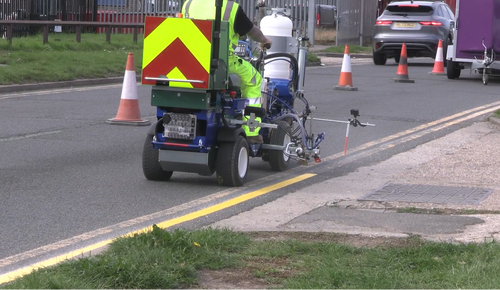
The new RoadLiner 570, spraying rapid-cure cold-applied road markings
Troubleshooting Common Line Marking Problems
The Shadow Line Problem
One of the most common issues is a shadow or gap running down the centre of the line. This typically indicates insufficient pressure for the tip size being used.
The solution is usually simple - increase pressure gradually until the centre fills properly.
However, if increasing pressure doesn't solve the problem, check two other factors:
- Tip condition - Worn tips lose their precision and won't spray properly regardless of pressure
- Paint condition - Old, contaminated, or over-diluted paint won't atomise correctly
Edge Definition Issues
Poor edge definition usually stems from incorrect tip selection or insufficient pressure.
If your lines look fuzzy or uneven, you're likely using too large a tip for the application or operating at too low pressure for proper atomisation.
Always use the correct size tip and preessure level for the application
Glass Bead Application: The Retroreflectivity Factor
The 60/40 Rule
For reflective line marking, understanding glass bead behaviour is crucial. The ideal application traps roughly 60% of the beads in the paint film whilst leaving 40% exposed for light reflection.
This requires precise paint thickness - too thin and beads fall out, too thick and they sink completely below the surface. Paint thickness directly affects retroreflectivity performance.
Insufficient paint provides no anchor for the glass beads, whilst excessive thickness buries them completely. Either scenario results in lines that don't reflect vehicle headlights effectively.
- Tip condition - Worn tips lose their precision and won't spray properly regardless of pressure
- Paint condition - Old, contaminated, or over-diluted paint won't atomise correctly
Highway Standards and Regulations
For highway applications, retroreflectivity isn't optional - it's regulated. Measurements are taken in millicandela per square metre, with specific targets depending on the line's purpose and location.
Achieving these standards requires not just proper bead application, but correct paint thickness to support optimal bead positioning.

Remember the 60/40 rule: 60% of the beads in the paint, 40% exposed for light reflection.
Best Practices for Consistent Line Marking Results
The Two-Coat Advantage
Rather than applying one thick coat, professional contractors often apply two thinner coats. This approach offers several advantages:
- Better paint curing and adhesion
- Improved durability
- More efficient paint usage
- Superior finish quality
The key is ensuring each coat is applied at the correct thickness - two thin coats don't mean two inadequate applications. Ensure the first coat is fully cured before applying the second.
Documentation and Consistency
Professional line marking requires documentation. Record your settings for different conditions:
- Tip sizes for various line widths
- Pressure settings for different temperatures
- Height adjustments for optimal spray patterns
- Paint thickness measurements for different products
This data becomes invaluable for training staff and ensuring consistent results across different jobs and seasons.

The key 3 line marking principles: paint thickness, spray tip selection, and pump pressure
Common Line Marking Misconceptions
"Any Tip Will Do"
Many contractors believe that as long as the spray produces the right width line, the tip choice doesn't matter. This thinking leads to poor edge definition, excessive paint usage, and inconsistent results. Professional tip selection is based on the desired line width, not trial and error.
"Thicker is Better"
The assumption that thicker paint automatically means longer-lasting lines is costly and counterproductive. Proper thickness based on manufacturer specifications always outperforms arbitrary thick application.
"Temperature Doesn't Matter"
Ignoring environmental factors leads to inconsistent results and customer complaints. Professional contractors adjust their techniques based on conditions, not just machine settings.
Building Professional Line Marking Standards
The difference between amateur and professional line marking lies in understanding these fundamentals and applying them consistently. It's not about having the most expensive equipment - it's about understanding how paint, equipment, and environment interact.
Professional contractors invest in proper measurement tools, maintain detailed records, and continuously adjust their techniques based on conditions. They understand that line marking is both an art and a science, requiring technical knowledge alongside practical skill.
Moving Forward
Mastering these fundamentals transforms both the quality of your work and the profitability of your business. Consistent, professional results come from understanding the science behind the process, not just following routine procedures.
Whether you're marking car parks or highways, these principles remain constant. The investment in proper technique, measurement tools, and understanding pays dividends in reduced callbacks, improved reputation, and better profit margins.
Professional line marking isn't just about getting paint on the ground - it's about applying the right amount of paint, in the right way, under the right conditions.
Master these fundamentals, and you'll separate yourself from the competition whilst building a sustainable, profitable business.
Upskill your line marking with our Training Academy


